REWINDING A DC BRUSH-TYPE MOTOR
by Robert Deppen (NOTE: this author is not available to answer questions)
This document is written for those who wish to rewire a DC brush type motor. Rewiring a DC motor is not difficult and can be quite rewarding depending on what a person wishes to achieve. Electric motor design itself is a very complex undertaking and is not meant for the novice. This document will not discuss matters of motor design as the contents of such a subject are well beyond the scope of this document or many readers? ability to comprehend. We will stick to the basics as that is all that is needed in order to successfully complete a motor armature rewind.
Included on this page is a small, easy to use PROGRAM that will assist anyone interested in rewinding motors in choosing the proper "Magnet Wire" for their particular motor. The program is offered free from the manufacturer and is included here as a small download so as to eliminate the necessity of serious web browsing in order to find this information.
WHY REWIND A MOTOR?
Most people might wonder why it is that a motor would need to be rewound. There are two reasons. The motor may have failed due to extreme overheating. If a motor overheats, the windings in the motor may melt the enamel originally coating the windings, causing a short in the coils. A person may wish to rebuild a motor to his or her own specifications. A motor can be rewound to change its performance.
By decreasing the number of windings per coil in a motor, it will turn at higher RPM but will deliver lower output torque. By increasing the number of windings per coil, the motor will rotate at lower RPM, but will deliver higher output torque. Anyone, who creates his or her own scooters or go-carts, will benefit from the information in this document.
STARTING OUT
First a person needs to determine if rewinding a motor is really what they need, or want to do. I cannot stress this enough! Once you begin this process, there is no turning back! You cannot remove the original windings of a motor without damaging them. This is the point of no return.
This tutorial is based on a 280 or 300 watt, 24 Volt DC brush type motor used in scooters. Your motor may be different somewhat but the technique is the same. Use this tutorial as an example only. As with any project, you must pay attention to what you are doing during each step of the process. I would recommend obtaining a pad and pencil to keep records of anything you believe would not be committed to memory. Do not take chances! There is nothing worse than rushing to remove the original coils, only to face the fact that you didn?t document the pattern the coils were wound in. As part of the document, I have drawn some simple CAD drawings that show the disassembly of a typical motor, as well as the winding pattern of the typical 280-Watt scooter motor.
It is important in any motor work, to have a clean and dry place in which to work. Keep this work area free from metal shavings, as we are dealing with strong magnets that will suck them up and cause problems later on. If a file is to be used at any point in the rewire, use it away from your work surface. Do not bring tools to the work area unless you are sure that they are free of metal particles such as metal dust or shavings. Be clean. If metal debris of any sort is detected in the work area, brush or vacuum them away promptly. If metal debris is already clinging to your magnets upon motor disassembly, use a toothbrush to brush them off the magnets. A quick movement with the brush should provide enough speed to break metal debris from the grip of the magnet. If it does not, then pinch the debris off with a soft cloth. This aside let us continue to step one.
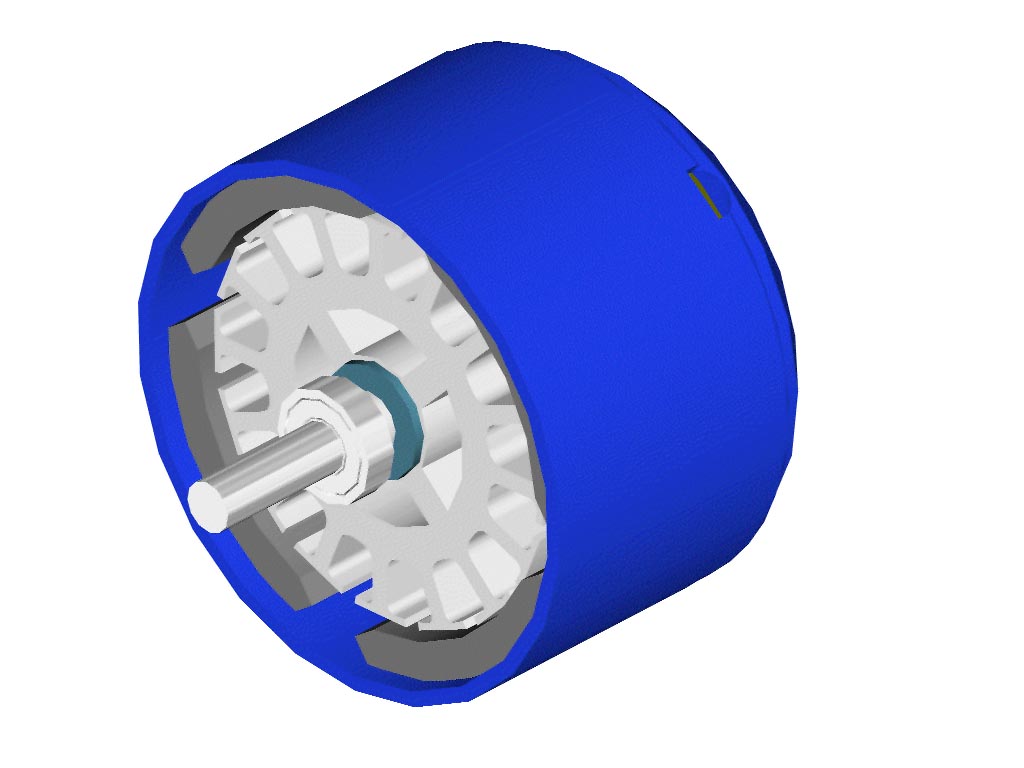 STEP 1 STEP 1
Locate the four motor end plate screws. Be careful with them! They are not the highest quality screws and are installed at the factory using power drivers. They are screwed in pretty tight. The best way to break them free is to first use a screwdriver that fits the screw head the best. Too large or too small will damage the head of the screw making it nearly impossible to further attempt removal. Apply as much downward pressure as possible, to insure that the head of the driver remains in the screw. Apply a continuous turning pressure until you feel the screw crack loose. Do this to all four screws. Once all screws are cracked loose, continue to remove all of them in normal fashion. Place the screws in a plastic bag to prevent them from becoming damaged, lost or dirty.
Next you will need to remove the end plate. It is best to use a thin bladed flat screwdriver. Place the end of the screwdriver in the seam between the end plate and the rest of the motor housing. Gently twist the screwdriver to crack the end plate loose. It may be necessary to do this at several locations along the edge of the end plate. Once the end plate is loose, gently wiggle it back and forth with a slight pulling pressure to slide it off the main shaft bearing. The bearing sits in a recess that is machined into the end plate itself. The bearing fits this recess pretty closely, but should slide out of the end plate with little difficulty. A gentle wiggling movement should cause the end plate to slip off of the bearing. The bearing will remain on the shaft and you should leave it there. There is no reason to remove it.
STEP 2
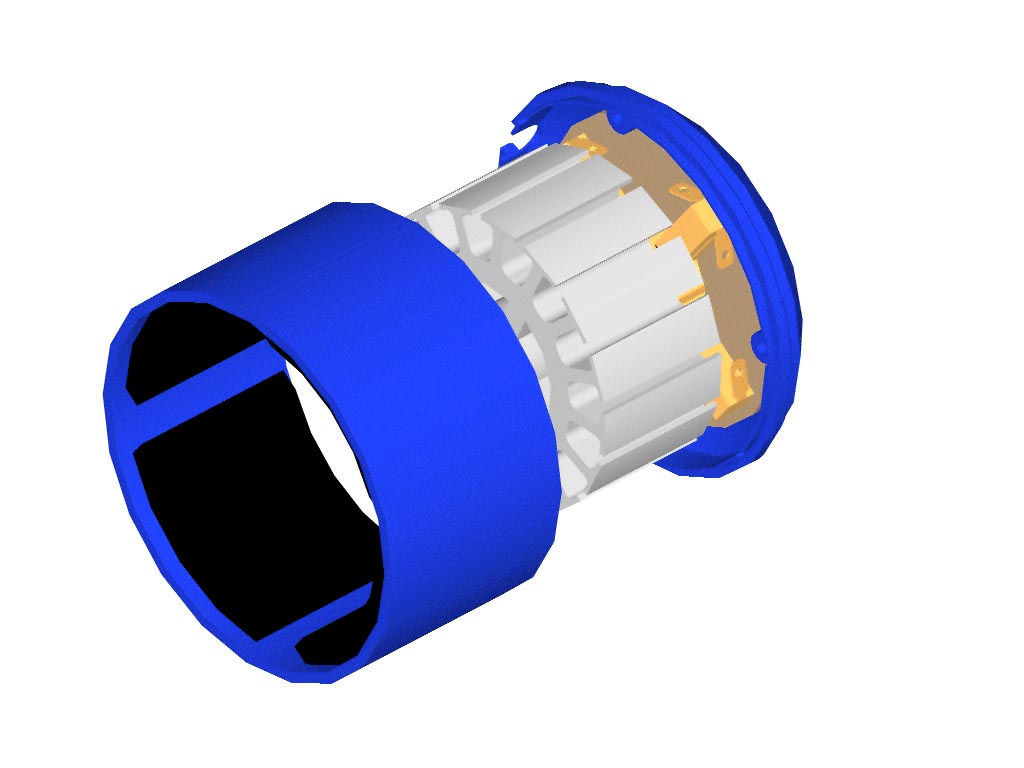
With the end plate removed, look into the motor. You will see the armature sitting in the center of the permanent magnets. Your next goal is to remove the armature. This is to be done with care. You do not want to damage either the armature or the magnets surrounding it. The armature is made of many steel plates called a lamination. These plates are magnetic and will be attracted to the magnets. The magnetic force keeping the armature within the motor housing must be overcome. The armature will not want to leave the area it resides due to magnetic attraction to the magnets. It will be necessary to hold the motor housing firmly, then push on the shaft until the armature and the other motor end plate can be pushed free of the housing. This is not difficult to do, but if it is your first time you may be surprised at how much force it takes. Be careful, when the armature and end plate are being removed, the magnets will try to pull them back in again! Be aware of this before you start or you will be in for a surprise.
Once you have the armature and end plate removed from the main housing, be careful to remove the main housing from your work area. The magnets are strong and will cause the housing to roll towards any large metal objects nearby.
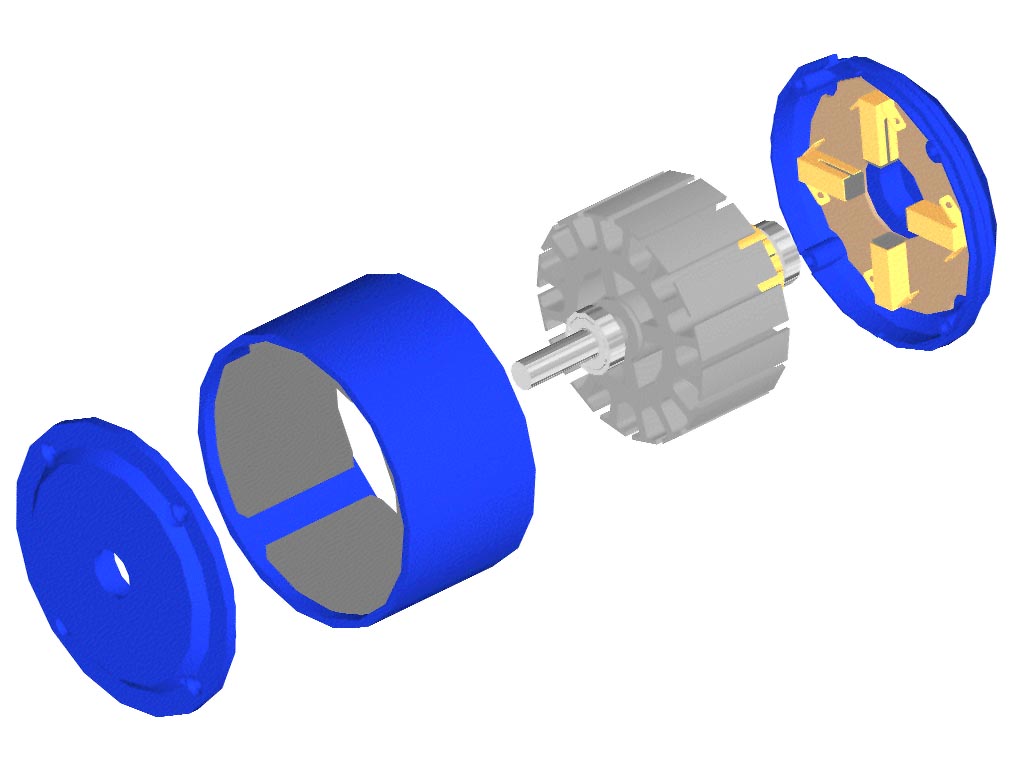
You will now notice that the armature and its end plate are still stuck together. This is because the second shaft bearing is still seated within the end plate. The bearing is not directly seated within the end plate. The bearing resides within a rubber sleeve. The rubber sleeve is seated in the end plate. Gently pull the shaft and bearing out of the sleeve. You will note a small spring washer fall out of the sleeve. This spring washer is needed when you reassemble the motor. Note its location and put it in a bag for safekeeping.
You will notice that there are four carbon brushes mounted to a plastic plate. These brushes will not fly away when the armature is removed from the end plate. These brushes are wired directly to the main power wires. Be careful to remove the springs behind the brushes by pulling the brushes gently from their brass housings. Keep the springs in your bag. This will prevent them from getting dirty or lost.
When handling the armature from now on, take care not to damage the commutation pads. They are durable, but are made of copper and can be easily scratched or gouged by tools. Following is an exploded view of the motor when fully disassembled. Yes, the clever observer will notice that the screws and the spring washer and rubber bearing sleeve are missing from the drawing. I did not take the time to include them. You will also note that I did not draw the actual windings in any of the assembly drawings. This is because I am "ok" with AutoCAD, but not a master. Honestly, I don?t know how to draw coils. If anyone has this skill, please submit a drawing to this page for inclusion.
STEP 3
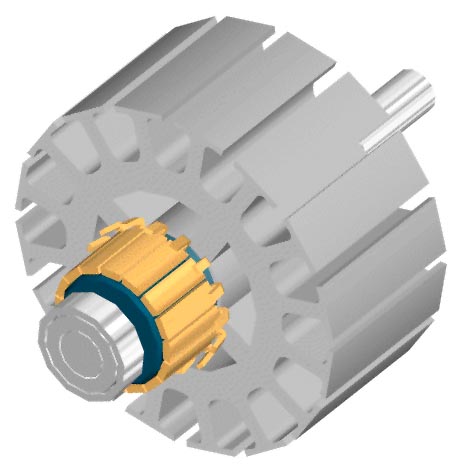
Now that you have the motor taken apart, observe the armature and how the windings are attached to the brush pads. You will see that the wire travels from one slot to a small tab on the brush pads, then back into another slot. You must remove the wire from these little tabs before you go cutting and removing the wire from the slots in the armature. You must bend the tabs gently so as not to stress them, yet give you enough space to remove the wire from their grasp. Use the edge of a sturdy knife, or the blade of a thin straight edged screwdriver. Place the edge of the knife or screwdriver under the edge of the tab and gently lift the tab a little higher than the diameter of the wire. Do this to all 16 tabs. Cut the wires that go to the tabs for easy removal.
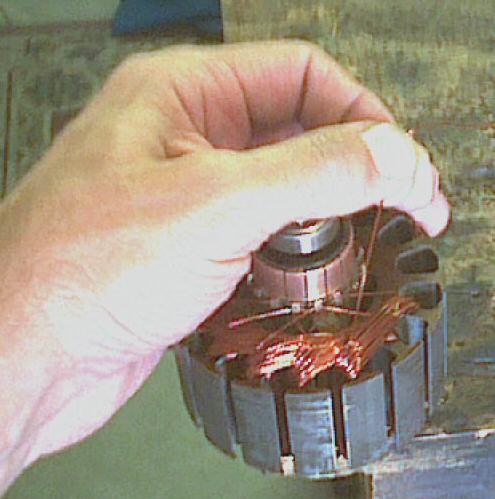
Next is to start cutting coils. How you do this is completely up to you. I have chosen to do this where the wire jumps from one slot to the other. Cutting a bit at a time, you can cut through this hump of wire until the bridge of wire is completely severed. Make sure you cut the wire leading to the tab on the brush pad and remove it from the tab. Next you should bend the wire bundle upwards so that it will pass through the slot. At this time, one full winding should be cut and its ends jutting upwards making the coil now look like a staple. Remove the entire coil from the armature. Continue to do this until all coils are removed from the armature. It should now look like this:
STEP 4
Now it is time to rewind the armature. In the case of the 280-Watt motor, use 22-gauge magnet wire. Included in this page is a small program that will allow you to view all characteristics, gauges, temperature ratings of various coatings etc. I chose to use a coating of Polyurethane and Nylon. This is because it is capable of withstanding temperatures up to 700 degrees. If a motor is going to overheat due to overcurrent conditions, it is wiser to go with a good magnet wire coating that will accept higher temperatures. This way, if the motor is overheating, it will not destroy your coils so easily. The original coating on the magnet wire was cheap enamel in a single layer. This is not a good choice for replacement windings. As indicated above, it is best to use Polyurethane and Nylon.
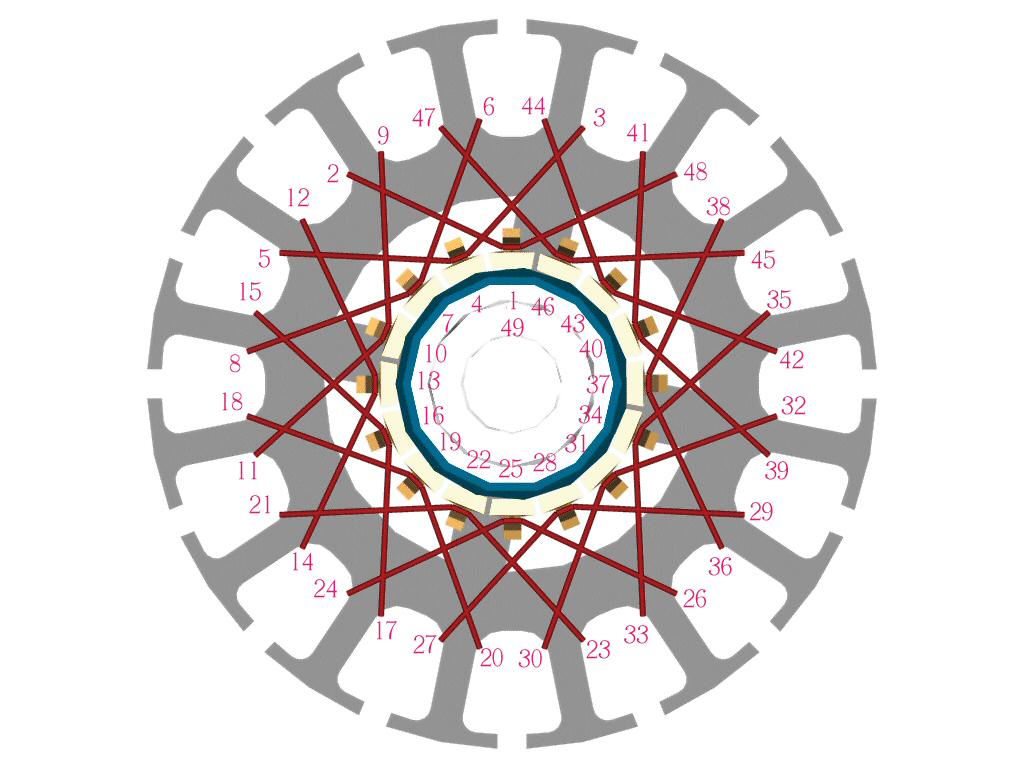
The winding pattern for this motor is not very complex. At first glance however, it may appear to be complex or confusing. Observe the winding pattern closely and you will see that each coil follows the same pattern of slot to tab around the entire armature. Numbers 1-4 shows this repeating pattern.
If the cardboard insulation pieces you removed from the armature during the removal of the original windings are not damaged simply put them back into the armature slots as they were before. You must wind the coils with these insulators in place. This will protect the windings from abrasion against the armature laminations. If the cardboard pieces were damaged either by burning during an overheat condition or by any other means, check them to see if they are still usable. If they are not or if you are in question as to their insulating quality, replace them with like material. An insulating tape meant for high temperature applications can also be used. Be sure to allow at least a little bit of insulation material to extend above and below the armature slots. This is to insure that the wire does not abrade against the edge of the lamination slots.
I have included a drawing of the winding pattern. In this drawing, you will see numbers. The numbers refer to the path of the wire in steps. Start with #1. This is the first tab on the commutation pads. Do not crimp the wire in the tab quite yet. Leave enough wire length for the coil to reach tab one and just leave it dangling until the first coil is done. This is because when the very last coil is wound, the end of the wire goes back to this tab. So, leave it open for now. Every other tab you pass a wire across however, should be crimped down again to hold the wire in place. Before you crimp the wire down, you must remove the coating from the wire to enable the wire to make electrical contact with the tab. You may do this by scraping it with a sharp X-acto type knife. You may also choose to use sandpaper, etc. Really the choice is yours, as long as the wire has good electrical contact with the tab. Do NOT remove too much insulation from the wire! Keep the stripped area very close to the tab. If you strip too much, you may cause a wire passing over it to conduct with it. The tab itself is only about .075" across. Strip a maximum of .125" of the wire, or 1/8th of an inch. Remember also that you are not to cut the wire during winding. All 16 coils are made from one long piece of wire!
The wire goes from tab #1 and drops down into the slot at point 2. The wire then goes across the bottom of the armature and comes back up again through the slot labeled #3. The wire will then go back down into slot #2, across the bottom and back up through slot #3 again. Do this 22 times, to make a 22 wind coil between slots #?s 2 and 3. Once you have wrapped 22 winds in this manner, the wire then goes over to the commutation pad labeled #4. The wire goes from this tab into the slot labeled #5 and comes back up through the slot labeled #6. Wind another 22 winds of wire in the same fashion as you did in the first winding.
I did not draw in the coils because it would have produced a drawing of extreme complexity and would have confused everyone. Just follow the pattern as described above, for each coil. Use the numbered point?s method so you know which tabs to go to and which slots to wind to. You will see how simple it is once you get started.
When you finish winding the very last coil, you will notice that the end of the wire has nowhere to go except back to tab #1. This is correct. It closes and completes the coil assembly. I labeled slot #1 twice as #1 and #49. The number 49 simply refers to the last point, which brings you right back to the start point at #1. Strip the insulation from the wire after cutting it to length and then crimp the tab closed. Make sure when cutting the wire to its final length, to leave about 1/16th of an inch extra for simplicity of holding the wire with a pair of needle nose pliers while you crimp tab one down.
Once the armature is completely wound, the wires going to the tabs should be looked at closely to make sure that none of them are touching each other. I used a plastic knife to make sure all such wires were not touching each other by bending them away from each other. Making sure the wire on top was more up and the wire going under was more lower. This insures that in case a person does scrape off too much insulation, these bare patches will not touch each other when the wires cross on their way to the tabs.
WINDING PATTERN
TEST FOR SHORTS
Now that your coil winding is done, you will need to check for shorts. The chances of shorts occurring are extremely slim. Just the same, check for shorts with a DMM (digital multimeter or similar device. Do this by placing one probe on each commutation pad and the other on any part of the armature laminations. Be aware that the very top and bottom pieces of the armature laminations are plastic. It is best to simply touch the armature with the probe on the side, where it is exposed metal.
The very last step is to test your new windings. Of course do this by reassembling the motor as it was before. It is not necessary to perform the test using your controller circuit. Simply apply the appropriate voltage for your motor directly to the motor power wires. Make sure the motor is secured if you are doing this on a workbench, as the motor has a lot of torque and will try to roll away.
MORE OR LESS?
The choice to add or remove windings is made depending on what you wish to achieve. I plan to rewind my 280-watt motor using 25% more coils than there was originally, or six more coils were added. I am doing this because I want to create more torque. It should have reduced the speed somewhat, but in fact by apparently winding the coils tighter it actually increased the speed to my surprise. I do believe this is the reason for the increased speed where there should have been none. This is really the only way I can explain the speed and power anomaly. After all, they should be inversely proportional.
An example of changing the winding count is this: Say you have a small scooter that is relatively lightweight. Say this scooter has a motor that allows it to run at approximately 10-15 mph. This is not always so desirable for everyone. Some people may wish to increase the speed of their motor. When you rewind your motor, wind less windings than there was before, such as 10-25% less windings per coil. This will increase the speed of the motor, but it will also decrease your output torque. If this is not a problem, simply use the motor you have and reduce its windings. If you still require high torque, but higher speed, then start with a motor of higher wattage. If the motor you are using now is a 200-watt motor, then purchase a higher wattage motor, then reduce its windings to increase its speed. You should wind up with a motor that is strong enough for the application, yet faster than a stock motor would be. That is the whole idea behind changing the motor windings.
As with any experimental adventures, use caution and think before acting. Pay close attention to the winding process. If you observed the winding pattern and read this article fully before you began, you should have no difficulty in obtaining the results you want.
It would be wise to balance the armature after winding it. You can do this using the same technique as balancing a wheel or a propeller. Suspend it between two objects by the bearings. The heavier side of the armature will roll towards the bottom. It is best to put a blob of epoxy on the top of the armature, right on the windings. The epoxy blob can then be filed until it balances out the armature. Keep balancing the armature until you are confident or satisfied it will perform as you expect. Don?t damage the windings during the balancing process, otherwise you will rewind again. Good you bought the 500-foot spool of wire!
|


